Peaceful Pleasures Health and Wellness
DIY Concrete Stepping Stone Mold | Garden Path Brick Maker
DIY Concrete Stepping Stone Mold | Garden Path Brick Maker
Couldn't load pickup availability
Create Your Own Beautiful Garden Pathway
Transform any yard, lawn, or garden into a stunning outdoor space with this heavy-duty plastic concrete stepping stone mold. Designed for DIY enthusiasts and landscaping pros alike, this reusable cement mold lets you cast custom garden path stones, decorative pavers, and brick-style tiles — right in your own backyard. Made in China.
Why You'll Love This Garden Path Mold
- Durable Plastic Construction: Engineered from professional-grade thick plastic, each mold is built to last — rated for a minimum of 1,600 uses as guaranteed by the manufacturer.
-
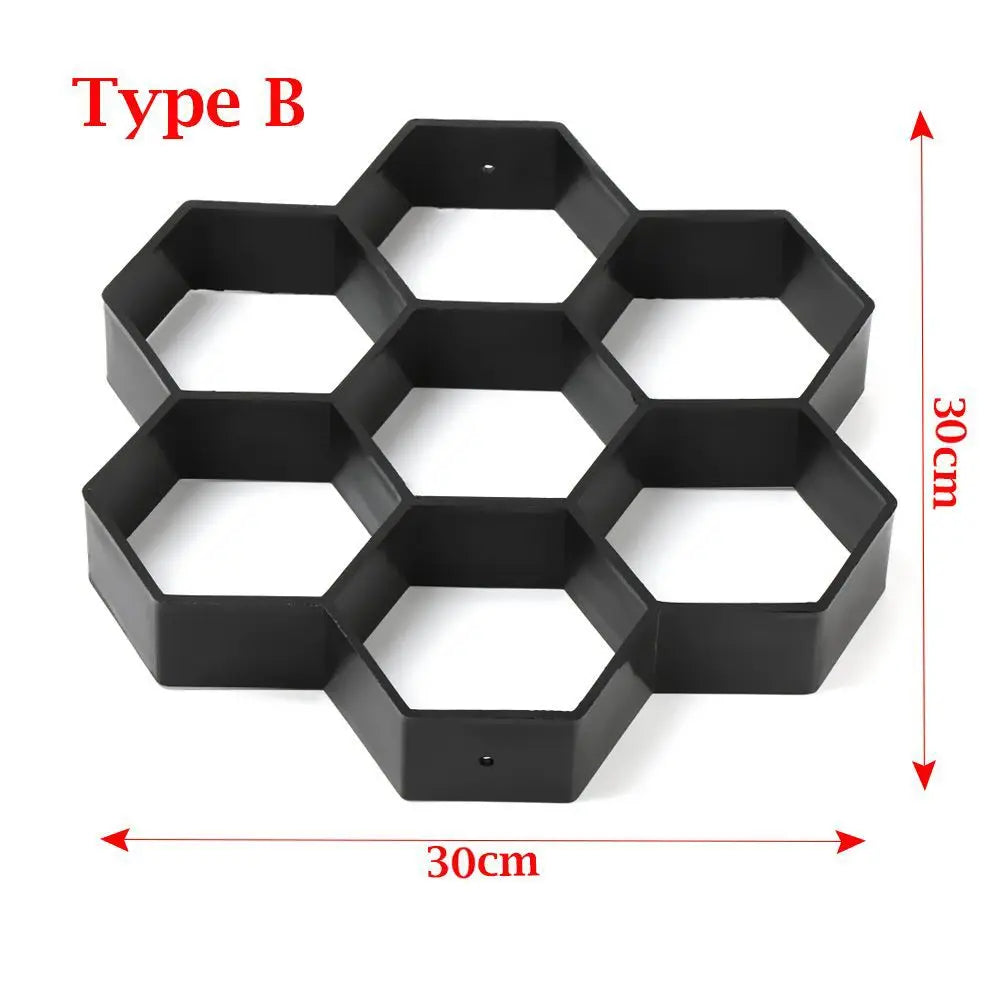
Multiple Sizes & Styles: Choose from 7 distinct shapes and sizes to match your landscape vision:
- Type A: 40×40 cm
- Type B: 36×36 cm
- Type C: 40×40 cm
- Type D: 34×34 cm
- Type E: 34×34 cm
- Type F: 36×36 cm
- Type G: 36×36 cm
- Easy to Use: No special skills required. Simply prepare the ground, place the mold, pour your concrete mix, smooth with a trowel, and lift the mold to reveal your finished stepping stone.
- Quick Reuse: Clean with a garden hose and immediately reuse — no waiting between pours! Create a full garden path in a single session.
- Versatile Application: Ideal for garden walkways, yards, driveways, patios, and lawn borders. Adjust your concrete mix consistency to achieve flat ground-level pavers or raised stone-height tiles.
- Color: Black (blends naturally into the casting process)
How to Make Your Own Stepping Stones
- Prepare and level the ground where you want your path.
- Place the concrete mold in position on the prepared surface.
- Premix your concrete to your desired consistency.
- Pour the concrete into the mold, filling each cavity evenly.
- Trowel the surface smooth for a clean, finished look.
- Allow the concrete to set, then gently remove the mold.
- Your custom garden stepping stone is ready — repeat to build your full path!
Pro Tips for Best Results
- Use a wetter concrete mix for flatter, ground-level stones.
- Use a stiffer concrete mix for taller, raised stone effects.
- Rinse the mold with a garden hose between uses for fast, easy cleanup.
- Please allow 1–4 cm variance due to manual measurement.
What's Included
- 1 × Plastic Concrete Stepping Stone Mold (style of your choice)
Related Products You May Like
- Funny Garden-Inspired Canvas Wall Art – "All Guests Approved By The Dog"
- Sage Green Motivational Quote Canvas Wall Art – Perfect for Outdoor Living Spaces
Learn More About Outdoor DIY & Garden Safety
For tips on safe outdoor construction and chemical handling during concrete projects, visit the U.S. Consumer Product Safety Commission (CPSC) for guidance on safe DIY practices.
Learn more: Pavers (flooring)
Frequently Asked Questions
Q: What types of concrete mixes work best with these garden path molds?
A: Both standard and ready-mix concrete work well. For flat, ground-level garden stepping stones, a wetter concrete mix is recommended. For raised or stone-height pavers, use a stiffer, drier concrete mix. Always mix thoroughly before pouring into the stepping stone mold.
Q: How many times can I reuse this plastic concrete mold?
A: This high-quality plastic garden path mold is rated for a minimum of 1,600 uses. Simply rinse the mold with a garden hose after each pour and it's ready to use again immediately — no drying time needed between uses.
Q: Which size stepping stone mold should I choose for my garden?
A: The best size depends on your path width and personal style. The 40×40 cm molds (Types A & C) are great for wider, more prominent garden paths, while the 34×34 cm options (Types D & E) are ideal for narrower walkways or tighter spaces. The 36×36 cm molds (Types B, F & G) offer a balanced middle-ground option.
Q: Can these molds be used on a lawn or grassy surface?
A: Yes! These concrete molds are perfectly suited for use on garden lawns, yards, patios, and soil surfaces. Just ensure the ground is level before placing the mold for the best results.